Wednesday, December 17, 2008

It's Christmas in 8 days OMG!!!

I can't believe it's only 8 days away, I'm no where near ready, I need more time. Still doesn't feel like Christmas anyway, maybe that's it, I'm sure Kye will enjoy it, Dina and Du being a little past the whole Santa thing (I think so anyway).

Last Thursday saw the gentle opening of our shop in Midleton, It's still very rough around the edges, but we'll get there. For now at least I'll be open there on Thursday, Friday and Saturday and I've taken the yarn and haberdashery supplies over at the moment. I'm hoping to squeeze a few craft basics in and squeeze basic yarn in here too, but it's going to take a little time to work out whats going where.
Thursday was also our last Scrapaholix of the year and we were working with dry-embossing. The kit colours were grey, white and black, which is such a fantastic combination that almost anything goes.


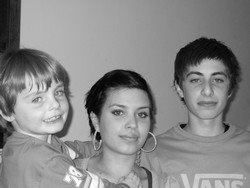
I thought the photograph I chose worked really well and this time I really didn't add anything to my basic kit, except for a little ink. The flowers and title were all cut using punches and the Sizzix. The alphabet is Retro Metro for those of you that are wondering.

Last night's club was a little quiet, however all that were present loved the cards I made using templates from Personal Impressions. Both the beer glass and the little girls dress make fantastic quick cards, which you can leave plain or decorate as over the top as you want. I'd be lying if I claimed these cards were anything but speedy. In fact I think I'd be hard pressed to make anything so good as quick.
This is the obvious card for those of us partial to a pint or two of the black stuff.

Here I've opted for the larger option, glitter card for the fizz.
This little dress card is just so cute, that I can see I' going to be using it for quite a while. The buttons are fixed using glue dots and add a real authentic touch.

Couldn't resit I'm afraid. I was always disappointed that my school never wore the gingham dresses that I know some of my peers got to wear. Perhaps that's where my fetish for all things gingham stems from.
Next Tuesday will be our last Card/Scrap club before Christmas and we're all going to make a card, have copious amounts of tea/coffee and eat a ridiculous amount of calorific treats.
xxxxxxxxx

Thursday, December 4, 2008

December Stamp of the Month

That festive time is looming once again and I had pretty much decided not to have a Stamp of the Month because everyone gets very busy around this time of the year. I changed my mind after discovering this set of stamps from Personal Impressions.
The Christmas set might cause you to think I've gone a little bonkers (was already), however it's a set of 7 stamps that's working out at a very economical €6.55 (including the 15% discount). The images are great and very, very, very good for those last minute cards, or for the kiddies to have a play with.

My cards this month reflect the 'quick card' ethos I've just mentioned, but remember the set is only available at the above price for this month or while stocks last.

The three tags have been stamped with Versamark first with the smaller snowflake and tinted with blue and green chalks. Next I stamped the larger snowflake using a Brilliance Trio ink pad. Brads are fixed to the centre of each large snowflake. I stamped the Merry Christmas greeting using the Brilliance ink pad again and embellished the card further with white Liquid Pearls.


This one is really a bit of a cheat, as you can see the holly sprig is in the corner. I didn't have time to make the card I wanted to, which is a Christmas Pudding, complete with Brandy Sauce and my holly sprig on top.


This time I've stamped the Christmas Bauble on light blue Mirri Card with Versamark and embossed them with fine detail white. I trimmed round them cutting of the loop at the top, fixed thin ribbon to the back of each and fixed them with silicone glue to create a raised affect. The papers are from the Snowy Jo Collection as is the Merry Christmas rub-on, a bow tidies up the ends.


The Snowman is stamped in blue Versafine ink and coloured in with Marvy le Plume markers, he's mounted with 3d foam onto a background of Versamarked small snowflakes which the camera hasn't picked up. The Merry Christmas greeting was also stamped with Versafine ink.

Snowman again, this time I've stamped him with black Stayz-on and shaded him with colouring pencils. The wall is created in the same way, the stamp was part of the farmyard set we had a few months ago. The background paper is another of the Snowy Jo ones and I've used Stickles glitter glue to embellish.

Hope you like them.

xxx

Wednesday, December 3, 2008

Twice in one evening

Back again, this time with Scrapaholix which was on Saturday just gone. This time we created something a little different to be kept or given away to a loved one as a gift. Using a handbag accordion album we created a wall hanging. In my case I asked my husband, 3 children and myself ("tell me a little bit about Lora"), to answer a few questions about themselves, so we can look back in a few years and see how we've changed.

As you can see it's turned out quite well, to the eagle eyed amongst you, you will no doubt have spotted that my youngest chap is missing. This is not because he has run away to join the circus, he gets that kind of carry-on here. It is because I have managed to mis-lay his glittered K and I'm too lazy to make another. It will turn up and I will finish my Millar Masterpiece.

The papers are from Rayher, as are the button embellishments. The glittered chipboard are letters taken from several sets, painted and glittered to match. Bright Mirri Board in festive colours, white and green ribbons and sparkly brads add the important finishing touches. Now to find Kye.....

Con
Me

Dina
Durahn

I'm off to catch some much needed beauty sleep, but I intend to get back here tomorrow to load up the stamp of the month samples.
Night Night

I thought it had only been...

Look even when I think it's going well I get side-tracked, I was absolutely convinced it had only been 2 weeks since my last post. I get here (at last) to discover it's actually been three. Well there's no hope and no pictures from 3 weeks ago at least not at the moment.

Going back to a fortnight ago now we were busy glittering Mandalas, that was the general idea anyway, glittering me was the reality. Anyone that knows me, knows I'm not a pretty pastel kinda girl, I do bright, bold in your face (never), so for those of you that like the more subtle, mandalas turn away now and scroll down. If like me though you like it bright, you'll like these.

They are all variations on the embossed, glittered and decoupaged theme, so there's not really much to tell.

This one hasn't even made it onto a card as it's just so cool.


This one and the next are the reverse of each other. 2 colours of glitter and 2 colours of card.


This one is one of the snowflake mandalas and I've only used transparent glitter on the blue card.


This one is my favourite, it's the Crocus Mandala from Elusive Images and I created the whole thing twice, mounted them onto each other, sandwiching a tassel between, so I can hang the decoration on my Christmas tree.


I'll be back in a minute to pop up a little bit about Scrapaholix too.
xxxx

Thursday, November 20, 2008

Shrink Plastic

Last Tuesday we had a play with Shrink Plastic. In order to demonstrate the differences in shrinkage between the different types of plastic I used the same stamp - this months stamp of the month.

This one has been created using white shrink plastic. I've blended the chalks into one another and then stamped in Stayz-on

Frosted shrink plastic on this one. Chalked and stamped with blue Stayz-on.


This time it's clear shrink. Stamped with Stayz-on and stuck own with Glossy Accents because it dries clear.


And this one is on black shrink plastic. This time my Stayz-on was the opaque white, the really pretty blue was a mistake. There was blue on my stamp because I forgot to clean it before I used the white -oops!

Same card in 4 different styles.
xxx

Wednesday, November 19, 2008

Scrapaholix - Fragments

It's been longer than I had planned but I've made it none the less so I won't be too hard on myself. Scrapaholix as I mentioned in my last post took place on the 9th and was fab. This month we got to have a play with Ranger's Fragments and they have certainly won my seal of approval. The only problem now is trying to find a supplierthat has them in stock.

As well as my layout which you can see below we also made a mini album from a paper bag. The papers this month were travel inspired which worked really well with my very poor photos (taken on a disposable) from a holiday to Portugal.

Now I know paper bag albums have been around for ages and that there are some die hard scrapbookers out there that wouldn't be caught dead making them, but I like them. There a great way to make a quick book, 6 pages plus the front and the back, with a couple of pockets to stash things away. I think you'll agree they can be very, very cool.

Nearly all of the embellishments came from the fab Travelogue papers. The tab was cut out on the Quickutz and I used some groovy black and white polka dot ribbon for my tags. As per usual for me everything was inked, if it's not screwed down, it's likely to get inked.

As I said already my photos weren't the best so a small book really helps to get the most out of them. It also means there's somewhere to put your plane tags, tickets and other bits and bobs.

Here is this months stamp in all it's glory, this one is really working hard for me I have absolutely loads of uses for it. You can't really see that there are Fragments on these pages, but they really add dimension.

We're going to squeeze in 2 more kits before Christmas, at the end of the month we're making a Christmas gift and then in December we'll be dry embossing. Loads of fun.

I'm hoping to put up last weeks cards in a little while.

xxx

Friday, November 7, 2008

November Stamp of the Month

This week so far has been all go, go, go and I've hardly had time to catch my breath, shouldn't complain. Tomorrow is Scrapaholix, yippee, my layout has been ready since the end of last week and I'm dying to get going because I had so much fun. Well prepared you might think, particularly for those of you that know me well, however, I still have to write and type my notes, erm......
Getting back on focus, Tuesday was the first Tuesday of the month so that means it's time for the new SOTM. This month's is definitely a little different to my usual selections and for good reason. Stamping is hugely versatile, all it takes is a little imagination and a different ink/paint, to transform something.

The Take a Note set from Stampendous is a truly versatile stamp, you can use it on so many things, cards obviously, scrapbooks, gifts (recipe books, jotter pads), etc. I have loads of ideas for it, now I just have to find the time. As is the norm the stamp has 15% off for the month whilst stocks last.

For the purposes of this demonstration though, I shall be using mostly cards, although I will upload some pictures of my Scrapaholix work after tomorrow, so you can see it used.

This one is a good basic card, I've stamped and embossed the notepaper and message in gold on cream cardstock. Using peel-offs I added the Golden Wedding and the 50 and then randomly stuck more peel-offs onto a scrap of Mirri card (remembering to take them over the edge). With yet another peel-off I created the 3d 'flower' in the right hand corner and once stuck down over more fancy card, it becomes a 'wow' card.

I'm disappointed that this one hasn't come out more clearly in the photograph because the pink background paper was created with the Adirondack Dabbers, a technique I intend to demonstrate over the coming weeks. One of the ideas I had when I chose this stamp was the idea of telling someone you love to take a break. By sticking down an individual tea bag or chocolate bar it helps to reinforce your message. The background paper is a K&Co. one.

This card has been stamped and embossed in one of the new pearlescent embossing powders. The 7 is cut out of Mirri card on the Cricut, which despite how much I love my Bigshot, I have to accept that for Mirri card it's not great. The card is actually royal blue, and lime green, but that hasn't come out to well in the photo. The idea is that you can write the birthday boy's name before the 7 and 'Today' after.

This card has been created by stamping onto some previously distressed cardstock, then tearing and further distressing. The background papers are from K&Co. whilst the other was made by brayering onto matt cardstock. The paper rose has been threaded through the stamped cardstock to secure it and the mini postcards are placed to conceal the holes. The heart charm has been suspended with thread (should hang downwards) and the hole card is finished off with a strip of olive green ribbon.
For this one I tinted white shrink plastic wit red chalk, before stamping the tiny hearts in Versamark and chalking over them again. Next I stamped the notepaper and message in
Stayz-on and punched holes over the drawn holes on the image. Once shrunk I coiled wire through the holes, to look like a notebook and matted and layered on one of the tag cards from last week. Finished off with a little ribbon and a white peel-off.

I hope you can see that I've really enjoyed making my samples this time. The stamp obviously lends itself very well to more contemporary cards, but I've managed to make two more traditional cards without even realising it.
I'll try and get the Scarpaholix pictures up as soon as possible.
xxx

Saturday, November 1, 2008

Halloween spooks

It's been half term this week and that has had the knock on affect it always does, my pile of things to do has increased ten fold.

The trick or treaters were out in force last night, no die hard ones at our house though (something to be said for living in the middle of nowhere). They must have been freezing though, it's been so cold, snow in Dublin, what's going on????


The cold days and nights make you want to stay in, by the fire and get creative, such a shame then that all my bits and bobs are elsewhere. Even so I've moved things in over the last couple of days to work on. However if I'm honest most of the work I've been doing has been for the website, which is getting ever closer. Who'd have thought there was so much to do??


Getting back to the job in hand Tuesday nights club was a giggle as usual, after we'd discussed Shingles (lol) I showed my cards which are all made using the new tag cardblanks. I'd be the first to admit that they are definitely not the cheapest cardblanks, nor are they the largest, but they are some of the easiest and therefore quickest, to use to great effect.


My first card has been stamped down one side using an Opalite ink pad. The trees in the centre were stamped in Versamark and embossed with one of the new pearlescent powders. Matted on green Mirri card and then green Stickles has been used to decorate. I've finished the tag off with a piece of satin edged, organza ribbon.


This one is my take on a sympathy card, the stamped image is one taken from the stamp of the month set and I've used black Stayz-on. I chose to layer the plain image on a gunmetal Mirri card and used a plain white satin ribbon to finish off.


On this one all of the stamping has again been done with Stayz-on purely because it is very intense on white card. The image has been coloured in a little with plain colouring pencils. A little bit of glitter card and a few gems add a bit of bling and I've opted to staple my ribbon to try and keep the card very contemporary looking.


For this one I've covered the whole card with K&Co. papers, inking around the edges to tie it all in. The stamped image is another from the stamp of the month, this time I've stamped the image onto Stampboard, before adding some shading with pencils and then layered up clear embossing powder. A peel off and gold ribbon finish off the antique look.


Last but not least is my Snowy Jo tag card. The card has been created using strips of the Snowy Jo papers, Snowy Jo himself is one of the Build a Jo stickers and Stickles have been used to create the snow. Finished off with a little two tone organza ribbon.


Next week is Stamp of the Month and then Scrapaholic, can't wait. I really love the stamp for November and am having trouble narrowing down my choice of cards to make.

xxxxxxxxx

Wednesday, October 22, 2008

Chalks

Last night we played around with chalks, quite often we use chalks very lightly to achieve light results. This time I used the chalks very heavily to achieve 'bold' affects.

All the images are from stamped with clear stamps from the Snowy Jo range and stamped in Versamark before being chalked.

The chalked baubles have been attached with gold brads to black glitter card and the triangle card has been finished off with a gold bow and bell from the Craftime Christmas range.


My little Gingerbread man makes another appearance again, heavily chalked in brown and matted onto some of the Snowy Jo papers, decorated with punched out snowflakes.

Snowy Jo himself......


Little chalked Poinsettias layered to form a Christmas Wreath. Mounted on green, gold and red cardstock.

To fix chalks I recommend a spritz of cheap hairspray, the cheaper the better.

Off for tea.

xxx

October Scrapaholix - Beading

Saturday was fantastic, we had a full house and time flew.

Scrapaholix rocked this month, I actually felt my heart in my hand when I first sat down to get my layout together. I could see lots of different layouts created with the kit, but as time is a factor I thought it would be tricky. My layout (I think) was a hit and I really hope all the ladies had a wicked time. Both Sue and Elaine came baring sweet treats, which meant I didn't feel so bad that my shortbread hadn't had time to cool. We ran over by 30 minutes and have decided to make the class that bit longer in future.

This is my layout as you can see there is quite a lot going on, but I'm hoping it doesn't look to 'busy.


This second layout compliments the first whilst giving me the ideal journalling space. The feel of the page is still very much the same and the two pages work well together side by side.


Lastly, this is a car I made using the leftovers, of which there were few. I added one of the big blooms purely because I love them.

xxxxxxx

Friday, October 17, 2008

Brayering with a difference

Part of Monday and Tuesday saw me up to my eyes in scrap paper, masking tape and baby wipes as I got my samples for Tuesday nights club ready. I got so stuck in that I ended up with loads of samples and had to pick the best ones with which to make my cards. My hands were stained with ink, which has only just come off.

All of these cards have been made using dye ink, the ink has been transfered from the pad with a brayer. To add further interest I rolled over the ink before it dried with a screwed up piece of scrap paper.

This card is created with a Distress Ink Pad, the Snowy Jo Gingerbread Man is then stamped on top with Timber Brown Stayz-on. Scraps of paper and card are used to compliment the image, to make a contemporary Christmas card.


Same technique this time I used a Big 'n' Juicy ink pad and black Stayz-on on a Magenta stamp. handmade paper scraps have come from the mega value packs.

This one has been created with one of the Adirondack multicoloured ink pads. The Faerie Poppet stamp has been embossed in fine detail gold embossing powder.

This one has been brayered with an Adirondack ink pad in Cranberry. The stamp is one from a Stamp of the Month set from last year and it's embossed in a detail, gold powder.

Lastly, my favourite, the background is a Adirondack multicoloured ink pad, the fantastic stamp is from Stampendous and embossed with a pearlescent graphite powder.

Scarpaholix tomorrow, can't wait. I've managed to create a two page layout and a card and have very few bits left.

xxxxx